Fruity Pebbles Cheesecake Tacos: A Deliciously Fun Dessert Recipe
Introduction
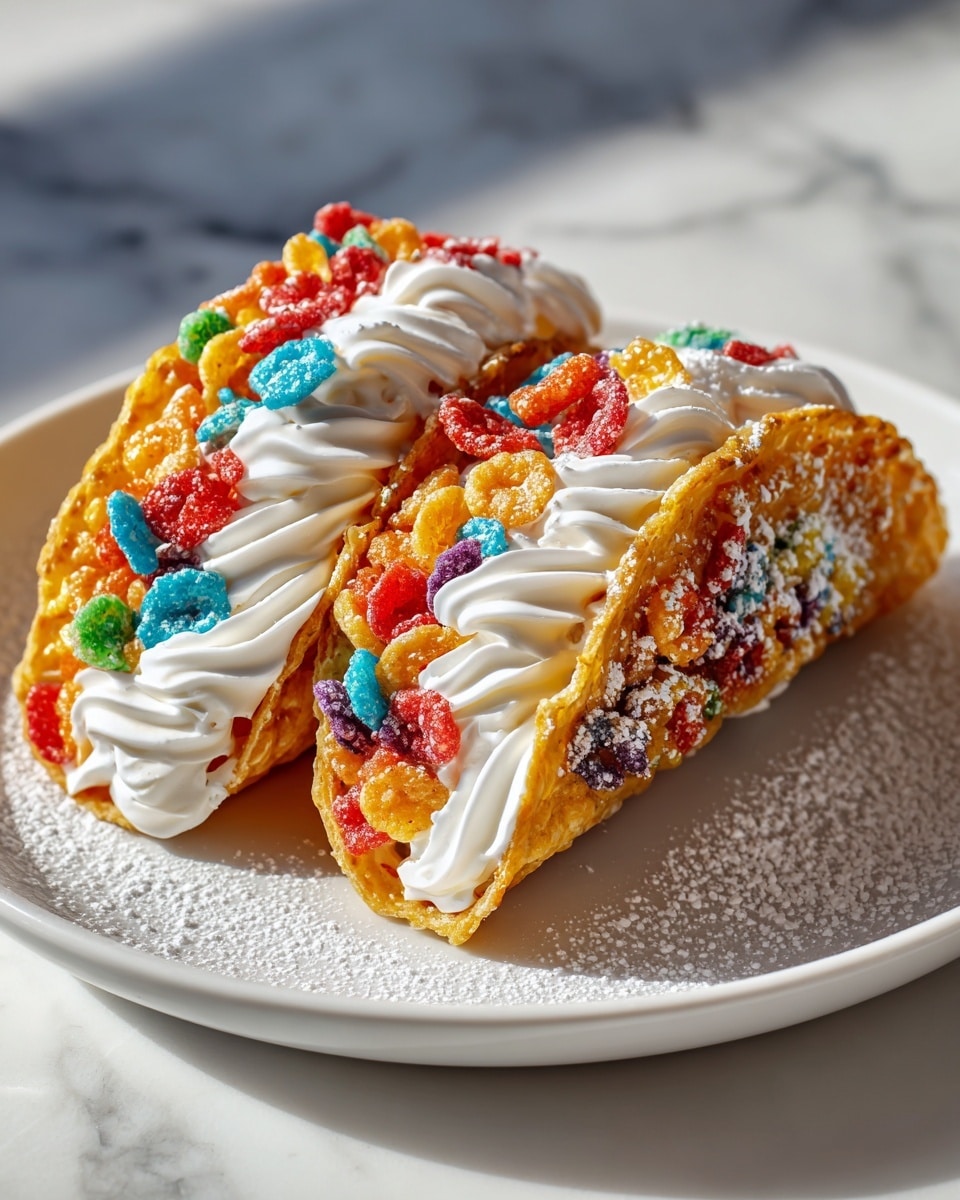
Fruity Pebbles Cheesecake Tacos are a fun and colorful dessert that’s as tasty as it is eye-catching. Crunchy cereal shells filled with creamy cheesecake and topped with fresh berries make for a delightful treat perfect for any occasion.
Ingredients
- 2 cups Fruity Pebbles cereal
- 2 tablespoons unsalted butter, melted
- 1 tablespoon granulated sugar
- 8 ounces cream cheese, softened
- 1/2 cup granulated sugar
- 1/4 cup sour cream
- 1 teaspoon vanilla extract
- 1/4 cup heavy cream
- 1 cup Fruity Pebbles cereal, finely crushed
- Whipped cream (for topping)
- Fresh berries (strawberries, blueberries, raspberries)
- Chocolate shavings (optional)
- Extra Fruity Pebbles cereal (for garnish)
Instructions
- Step 1: Pulse 2 cups of Fruity Pebbles cereal in a food processor until finely ground. Alternatively, place the cereal in a zip-top bag and crush with a rolling pin.
- Step 2: In a medium bowl, combine the crushed Fruity Pebbles, melted butter, and 1 tablespoon granulated sugar. Mix well to form the taco shell mixture.
- Step 3: Preheat your oven to 350°F (175°C) and line a baking sheet with parchment paper. Press about 2 tablespoons of the mixture into 4-5 inch circles on the sheet, spacing them 1 inch apart.
- Step 4: Bake the circles for 8-10 minutes until the edges turn lightly golden and the shells set.
- Step 5: Remove the baking sheet and let the circles cool slightly for 1-2 minutes. While warm and pliable, lift each circle and drape it over an oven rack bar or the edge of a muffin tin to form taco shells.
- Step 6: Allow the shells to cool and harden completely for about 15-20 minutes before removing them carefully from the rack or muffin tin.
- Step 7: Ensure your cream cheese is softened. In a large bowl, beat the cream cheese and 1/2 cup granulated sugar together until smooth and creamy using an electric mixer.
- Step 8: Add the sour cream and vanilla extract to the cream cheese mixture and beat until fully combined.
- Step 9: Gradually pour in the heavy cream while beating to make the filling light and fluffy.
- Step 10: Cover and refrigerate the cheesecake filling for at least 30 minutes to firm up.
- Step 11: Crush 1 cup of Fruity Pebbles cereal finely using a rolling pin in a zip-top bag. Pour into a shallow dish.
- Step 12: Dip the edges of each cooled taco shell into the crushed Fruity Pebbles, pressing gently to adhere the cereal to the edges.
- Step 13: Remove the filling from the fridge and spoon or pipe it into each taco shell.
- Step 14: Top the cheesecakes tacos with whipped cream, fresh berries, chocolate shavings, and extra Fruity Pebbles cereal as desired.
- Step 15: Serve immediately for the best texture and taste.
Tips & Variations
- Use chilled cream cheese and heavy cream for a firmer filling that’s easier to pipe or spoon.
- Swap Fruity Pebbles for another colorful cereal if you prefer a different flavor or texture.
- Try adding a drizzle of chocolate or fruit sauce on top for extra flavor.
- If you don’t have an oven rack bar, use the edge of a bowl or the side of a mug to shape taco shells while still warm.
Storage
Store assembled cheesecake tacos in an airtight container in the refrigerator for up to 2 days. For best results, dip the taco edges into crushed cereal just before serving to maintain crispness. Reheat the shells alone slightly in the oven before filling if they lose crunch.
How to Serve
Serve this delicious recipe with your favorite sides.
FAQs
Can I make the taco shells ahead of time?
Yes, you can bake and shape the shells a day in advance. Store them in an airtight container at room temperature. Dip in crushed cereal and fill just before serving to keep them crisp.
What can I use if I don’t have a food processor?
You can place the cereal in a sturdy zip-top bag and crush it finely with a rolling pin or meat mallet for the crust and edges.
PrintFruity Pebbles Cheesecake Tacos: A Deliciously Fun Dessert Recipe

Fruity Pebbles Cheesecake Tacos are a fun and colorful dessert featuring crispy, crunchy taco shells made from Fruity Pebbles cereal, filled with a creamy, fluffy cheesecake filling. Topped with whipped cream, fresh berries, and chocolate shavings, these tacos bring a playful twist to a classic dessert perfect for parties or a whimsical treat.
- Prep Time: 20 minutes
- Cook Time: 10 minutes
- Total Time: 1 hour
- Yield: 8 servings 1x
- Category: Dessert
- Method: Baking
- Cuisine: American
- Diet: Vegetarian
Ingredients
Taco Shells
- 2 cups Fruity Pebbles cereal
- 2 tablespoons unsalted butter, melted
- 1 tablespoon granulated sugar
Cheesecake Filling
- 8 ounces cream cheese, softened
- 1/2 cup granulated sugar
- 1/4 cup sour cream
- 1 teaspoon vanilla extract
- 1/4 cup heavy cream
For Coating and Toppings
- 1 cup Fruity Pebbles cereal, finely crushed
- Whipped cream
- Fresh berries (strawberries, blueberries, raspberries)
- Chocolate shavings
- Extra Fruity Pebbles cereal for garnish
Instructions
- Crush the Cereal: In a food processor, pulse 2 cups of Fruity Pebbles cereal until finely ground. Alternatively, place the cereal in a zip-top bag and crush with a rolling pin to achieve a fine texture for the taco shells.
- Mix Taco Shell Ingredients: In a medium bowl, combine the crushed Fruity Pebbles, melted butter, and 1 tablespoon granulated sugar. Mix until all ingredients are fully incorporated.
- Form and Bake Taco Shells: Preheat your oven to 350°F (175°C) and line a baking sheet with parchment paper. Press about 2 tablespoons of the Fruity Pebbles mixture into a 4-5 inch circle on the baking sheet. Repeat with remaining mixture, leaving about 1 inch of space between circles.
- Bake: Bake for 8-10 minutes until the edges turn lightly golden and the shells are set and crisp.
- Shape Taco Shells: Remove the baking sheet and let the shells cool slightly for 1-2 minutes until warm but pliable. Gently lift each shell and drape it over the bar of an oven rack or edge of a muffin tin to shape into tacos.
- Cool Completely: Allow the taco shells to cool and harden completely on the rack to maintain their shape, about 15-20 minutes.
- Prepare Cream Cheese: Ensure the cream cheese is completely softened before starting the filling.
- Mix Cheesecake Filling: Using an electric mixer, beat the softened cream cheese and 1/2 cup granulated sugar until smooth and creamy.
- Add Sour Cream and Vanilla: Beat in the sour cream and vanilla extract until combined thoroughly.
- Incorporate Heavy Cream: Gradually add the heavy cream, beating continuously until the filling is light and fluffy.
- Chill Filling: Cover the filling with plastic wrap and refrigerate for at least 30 minutes to firm up slightly.
- Crush Cereal for Edges: Place 1 cup Fruity Pebbles cereal in a zip-top bag and crush finely. Pour into a shallow dish.
- Coat Taco Shell Edges: Dip edges of each taco shell into the crushed cereal, gently pressing to adhere.
- Fill Taco Shells: Remove cheesecake filling from refrigerator and spoon or pipe it into each Fruity Pebbles taco shell evenly.
- Decorate: Top with whipped cream, fresh berries, chocolate shavings, and extra Fruity Pebbles cereal for a colorful presentation.
- Serve Immediately: For best texture and taste, serve the Fruity Pebbles Cheesecake Tacos right after assembling.
Notes
- Ensure the cream cheese is fully softened to avoid lumps in the filling.
- Do not overbake the taco shells as they can become too brittle to shape.
- Work quickly when shaping shells while still warm and pliable.
- Store assembled tacos in the refrigerator if not serving immediately but consume within a few hours for best texture.
- Feel free to use other cereals or toppings for variation, though Fruity Pebbles add a unique vibrant look and flavor.
Keywords: Fruity Pebbles cheesecake tacos, dessert taco recipe, fun dessert, cheesecake filling, colorful dessert, baked taco shells, fruity cereal dessert